A standard fireplace conversion
At Embers we love challenging bespoke fireplace installations. Most of the time, however, our customers require a simple swap out of an existing fireplace and a new one installing in its place.
Here’s a typical example of a wood burning stove we installed in 2014 in Four Marks, near Alton in Hampshire.
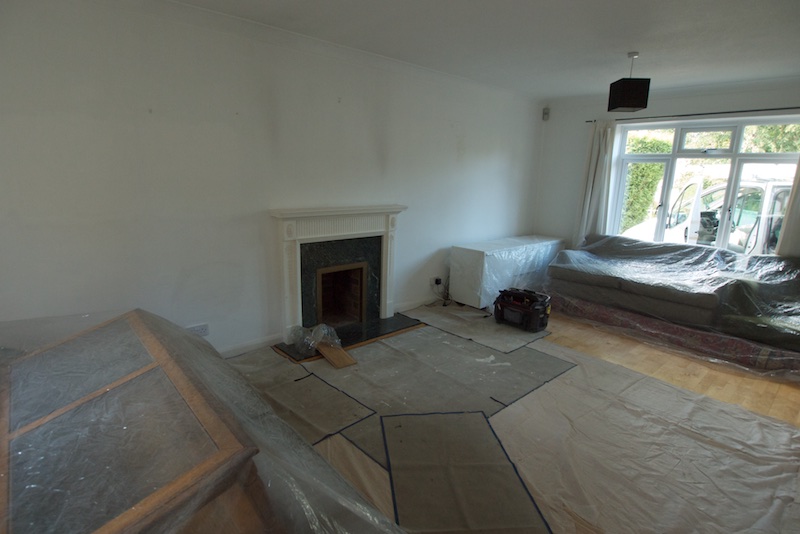
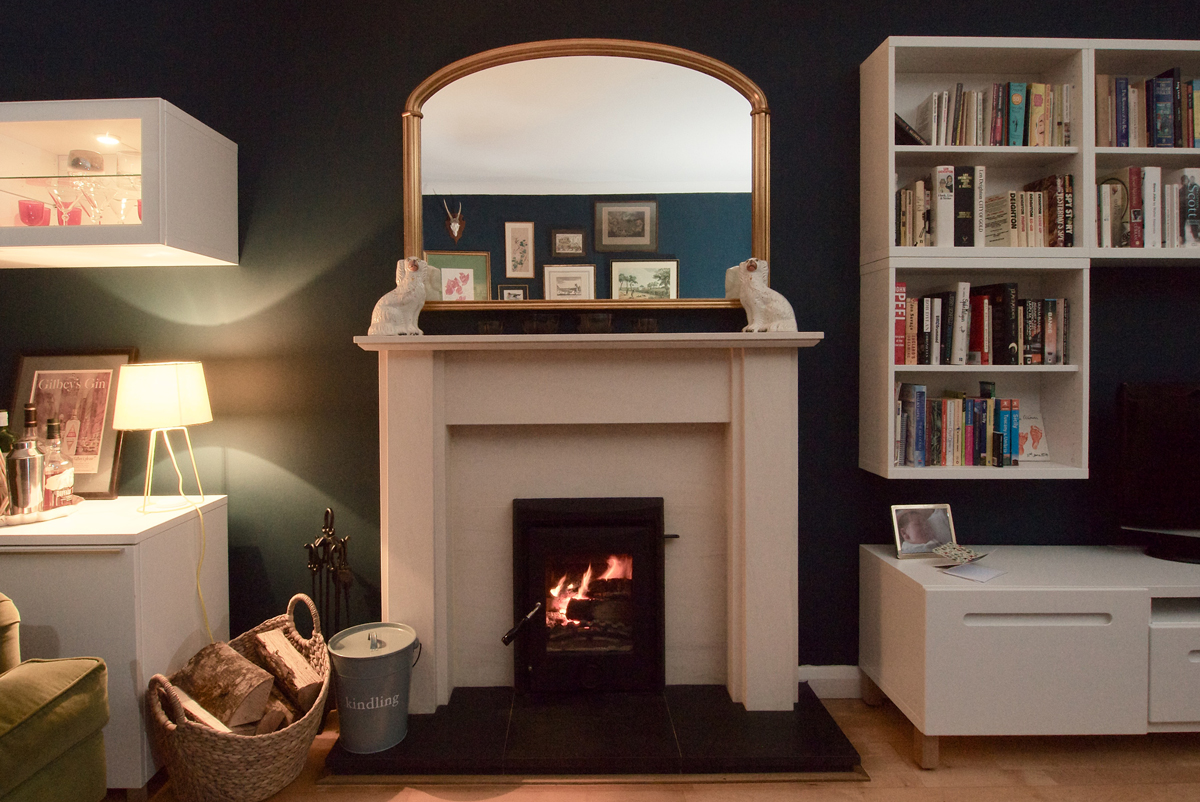
The house is a typical 1970s build. It has a British Standard fireplace opening British of 16" wide x 22" high. This is perfect for an inset wood burning stove. The customer chose a new model; the Newman Chelsea inset multi-fuel stove. An inset wood burning stove slides into the existing fireplace like a cassette. It creates a neat and easy-to-maintain fireplace.
For the surround itself, they chose a limestone mantelpiece with a simple classical design. This was paired with a split honed granite hearth. The hearth is split to allow for a wood burning stove to sit on top of it without it cracking.
Preparing the fireplace
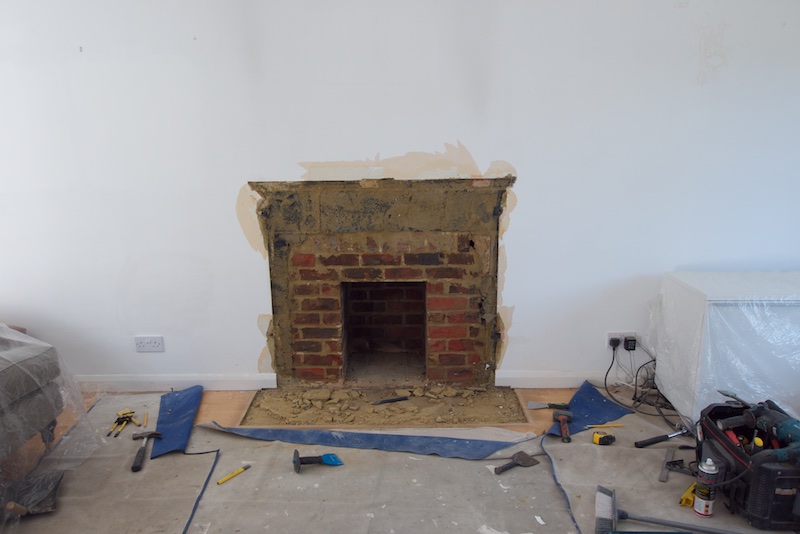
First of all the old fireplace surround and hearth was stripped out. We responsibly dispose of old fireplaces so you don’t have to worry about all that mess.
Next we made good the surface with mortar, ready to take the new fireplace surround, hearth and slips.
Installing the wood burning stove
The existing chimney was in good order so all we had to do was to line it with a flue liner. We use Poujoulat flexible multi-fuel flue liners. This was passed down the chimney and fixed to the chimney pot using a cowl.
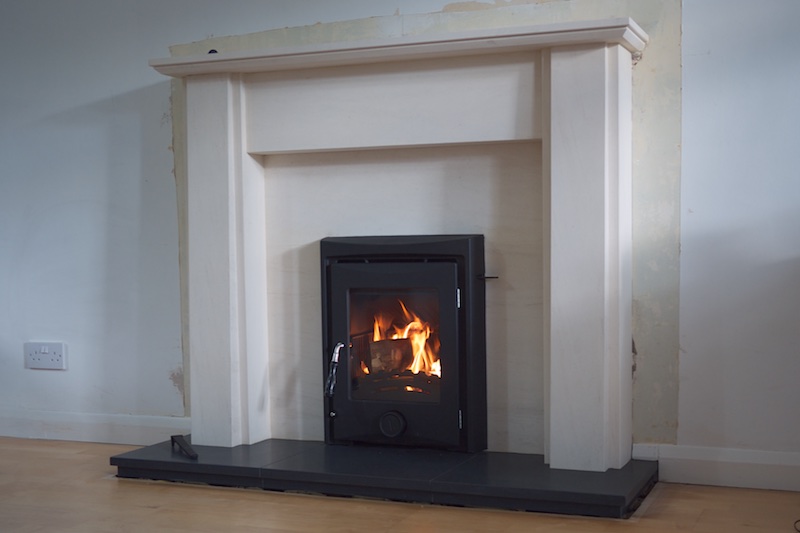
The wood burning stove was pushed into the fireplace. We infilled the back of the stove with a mixture of cement, breeze blocks and vermiculite. The chimney was back-filled using more vermiculite. This helps the heat remain in the fireplace rather than dissipate up the chimney.
The wood burning stove was then connected to the flue liner and once in position was sealed off using stove fire rope.
Testing the fireplace installation
Once the cement had dried we then tested the fire. The first burn always gives off a few vapours as the new paint burns off. All the windows are opened once the fire is lit.
This particular fire had an excellent draw and the log burner was roaring away in no time at all.
More often than not, our fireplace installation projects end before the decorators come in and put the icing on the cake. This time we got a photograph of the finished room once it had been painted. It looks pretty amazing, even if we do say so ourselves. The owners are delighted.
Our new wood burning stove installation went really well. The Embers team were super helpful and tidy. It only took one day to install and it really has transformed the living room.